

$ads={1}
In this tutorial, we will show you how to install a free SSL certificate on a shared Hostinger account using hPanel. If you’re running on cPanel, you can refer to this article instead.
Here are the steps to install Zero SSL on shared hosting using SSL For Free:
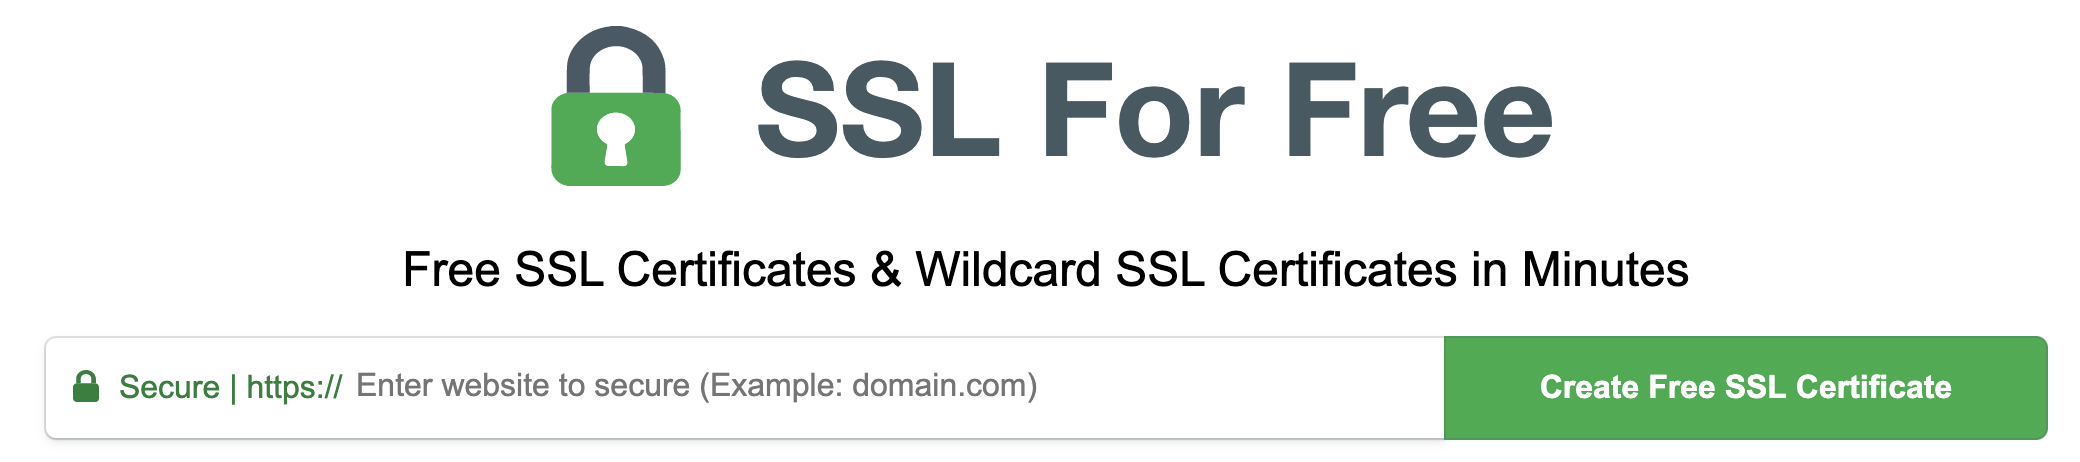
- On SSL For Free homepage, enter your website’s URL and click Create Free SSL Certificate.
- Double-check that the URL is correct, then create a login by entering your email and creating a password.
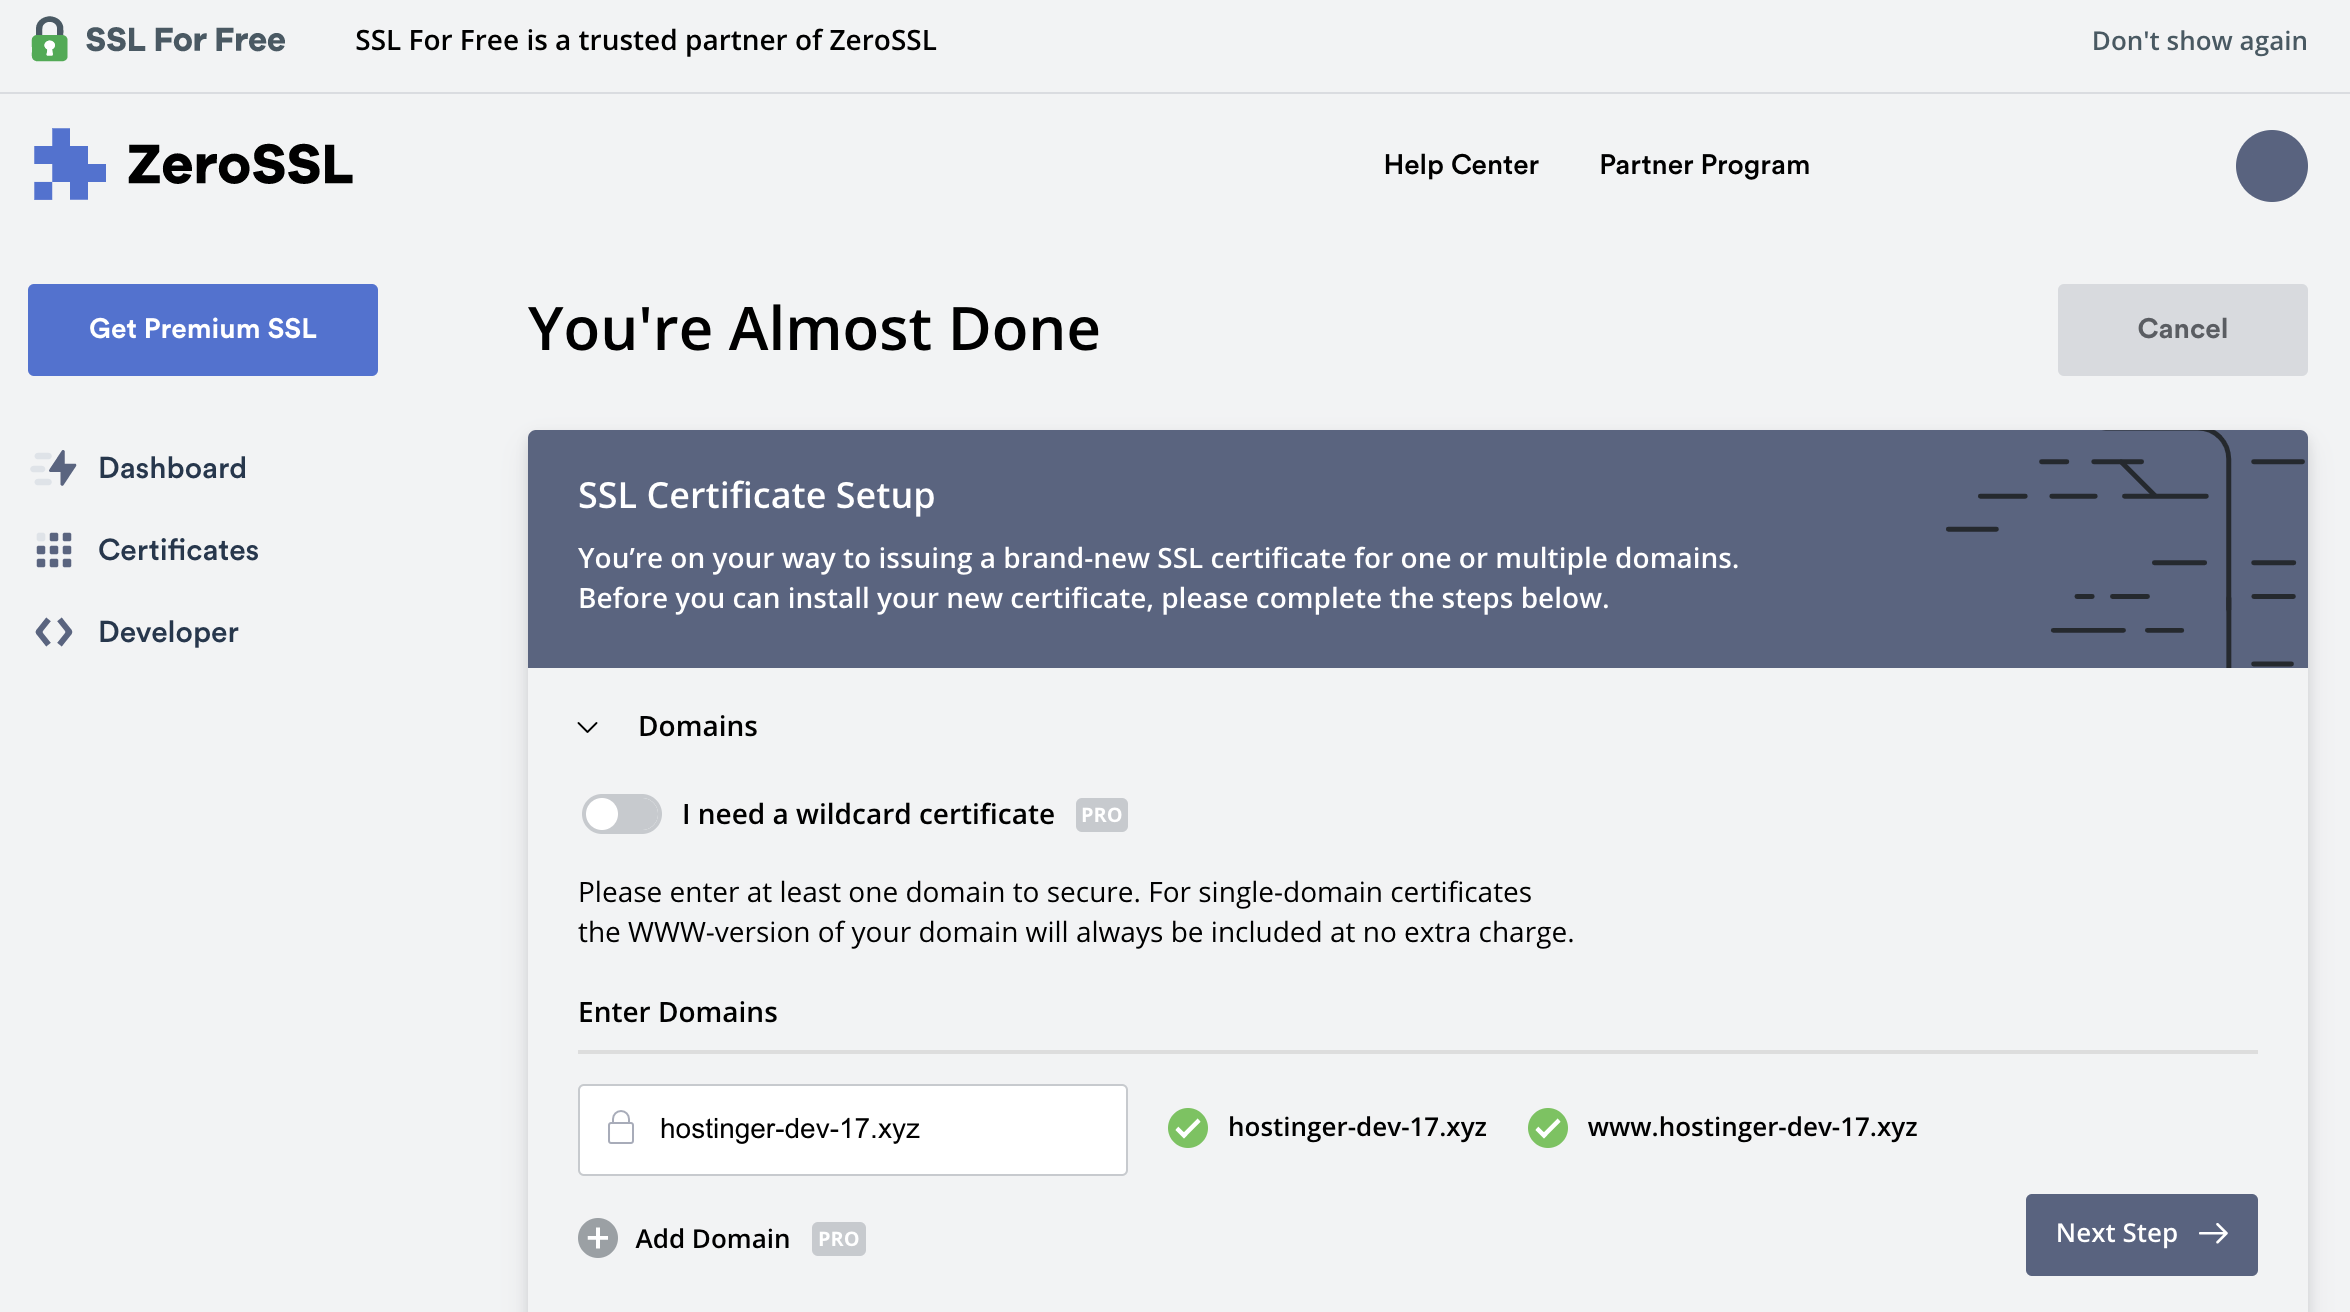
- Before you can install your new certificate, make sure the domain is valid, and click Next Step.
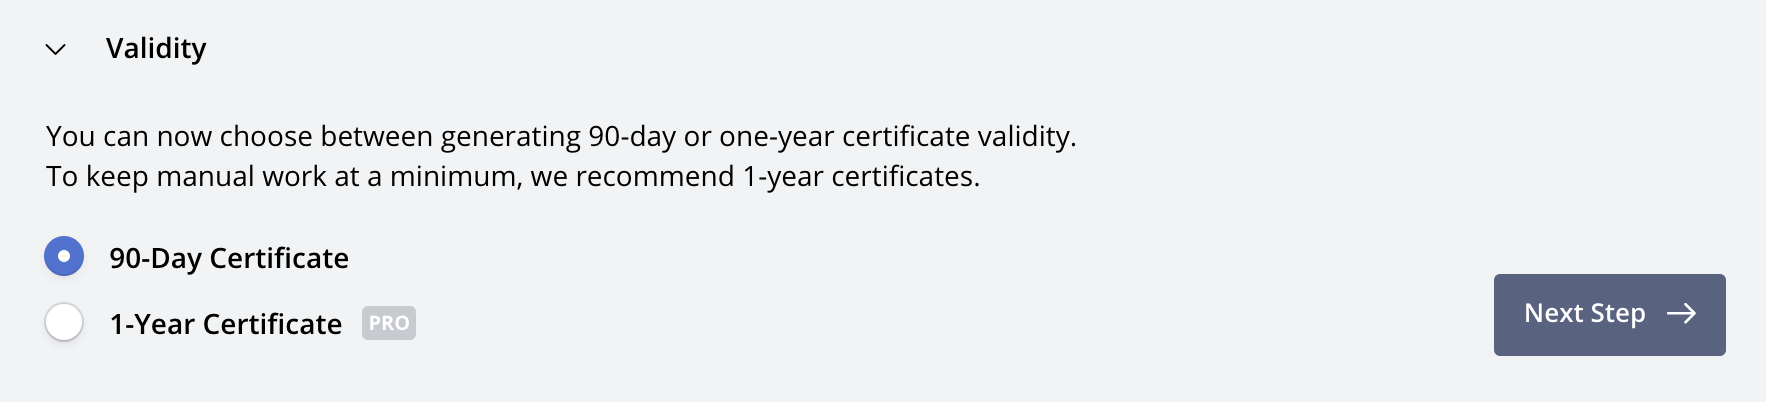
- Choose between a free 90-Day Certificate or 1-Year Certificate, and click Next Step.
- Uncheck the Auto-Generate CSR if you want to manually enter your contact information, then click Next Step.

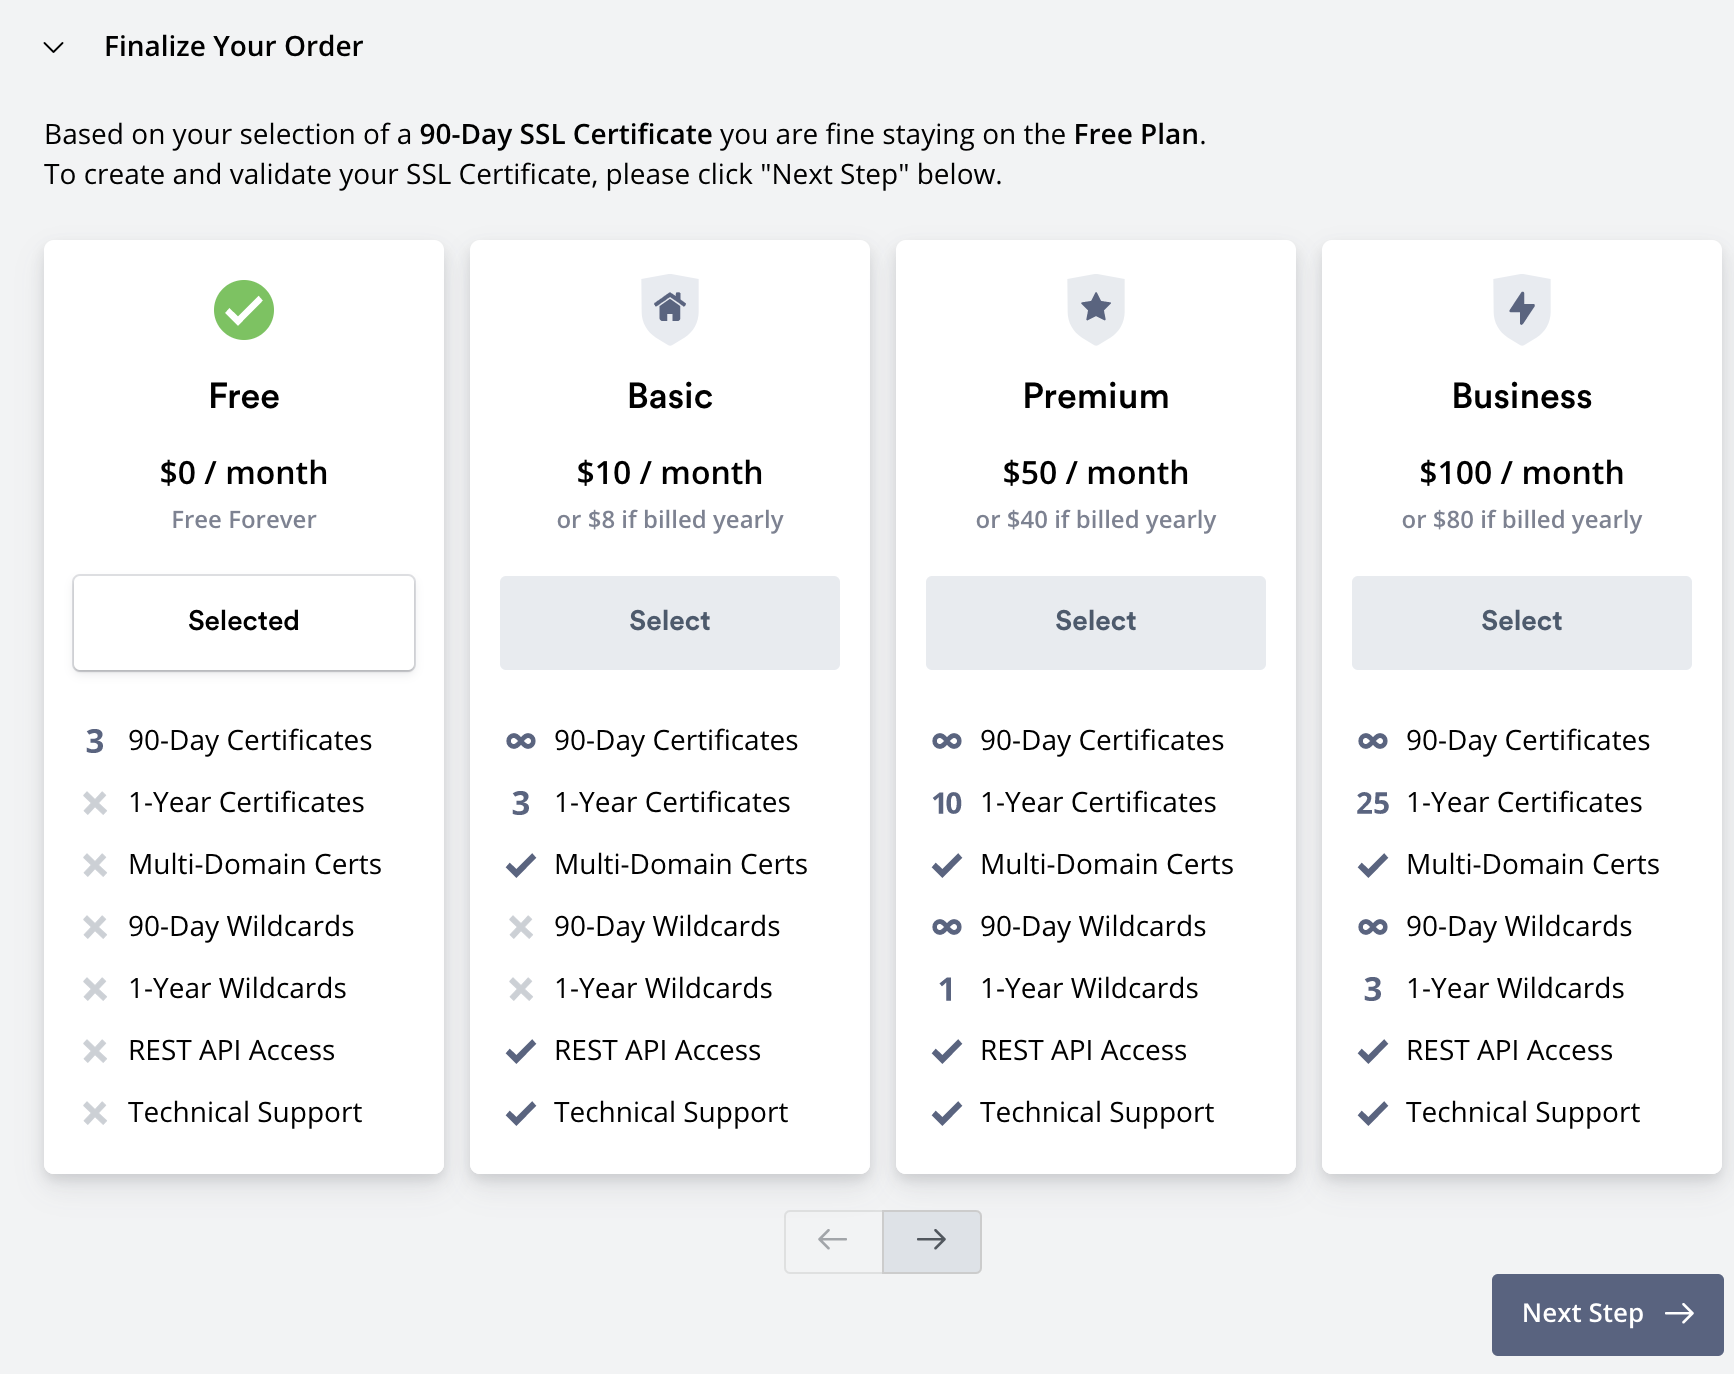
- Finalize your order and choose a plan, then click Next Step.
- Next, select the Verification Method you would like to use.
- After verified, click Certificates on your ZeroSSL menu.
- Click Download SSL Certificate to generate three sets of keys — CRT (certificate), KEY (private key), and CABUNDLE (Certificate authority bundle).
- Moving back to your hosting account, access the SSL menu under the Advanced section, and scroll down to Custom SSL.
- Paste the keys you have obtained to the appointed boxes, then click Install.
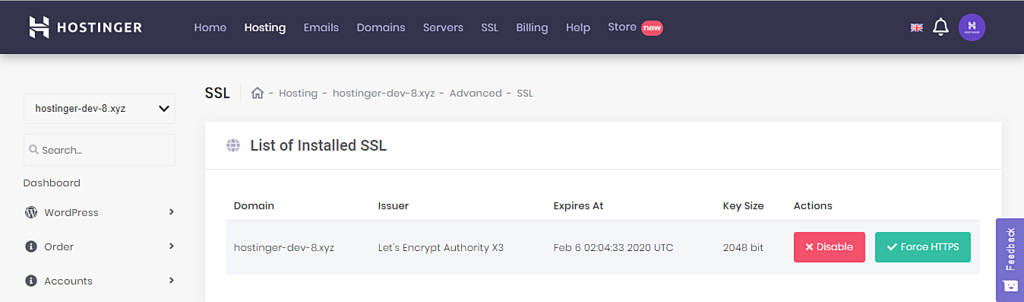
- If the installation process is successful, the SSL details should appear in the List of Installed SSL section.
Conclusion
The SSL protocol has gradually become a mandatory security protocol for all websites. If you don’t have a budget to purchase an SSL certificate, not to worry. You can install Let’s Encrypt free SSL certificate and still get all the SSL’s benefits.
